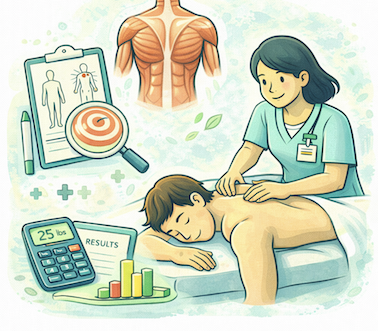
Palpation is one of the most powerful tools you have as a massage therapist because it turns your touch into assessment data you can use to plan safe, effective treatments. When you learn to feel differences in tissue tone, temperature, texture, and tenderness, the body starts “talking” to you in a language of its own. For students, developing reliable palpation skills is a gradual process of training your hands and your attention—not a talent you either have or don’t.
What Palpation Really Means in Clinical Practice
In massage therapy, palpation is the intentional use of touch to gather information about the body’s soft tissues and joints. It is different from treatment: you are not trying to change the tissue yet, you are trying to understand it. Through palpation, you can identify where tissues are guarded, hypersensitive, thickened, cool or warm, restricted, or surprisingly normal compared to the client’s complaint. This information supports your clinical reasoning alongside health history, observation, and movement testing.
 Key questions behind every palpation:
- What am I feeling (skin, fascia, muscle, tendon, bone, joint line)?
- How does this side compare to the other side?
- How does this area compare to what the client reports?
- Is this finding clinically important or just a normal variation?
Key Palpation Qualities: What Your Hands Are Looking For
To turn touch into meaningful data, you train your hands to notice specific qualities rather than just “tight” or “relaxed.”
Common palpation qualities:
- Temperature: Warmer areas may indicate increased circulation or inflammation; cooler areas may suggest reduced circulation or protective guarding.
- Texture: Skin can feel dry, boggy, smooth, or thickened; underlying fascia can feel gliding or sticky.
- Tone: Muscles may feel hypertonic, ropey, dense, or hypotonic and slack.
- Tissue pliability: How easily tissue deforms under gentle pressure and rebounds when you release.
- Tenderness and trigger points: Local pain on pressure, referred pain patterns, or a “jump sign.”
- Edema: Spongy, fluid-like swelling, sometimes leaving an indentation (pitting) when pressed.
By naming these qualities in your mind, you begin to build a mental “map” of the area and a vocabulary that you can use in your charting and communication.
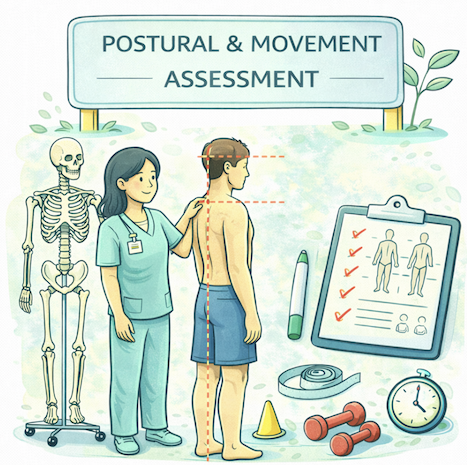
Layers and Landmarks: Feeling in 3D
Good palpation means feeling in layers instead of mashing everything at once. You learn to identify where one structure ends and another begins, and how deep you need to go.
A simple “layers” approach:
- Start at the surface: Notice temperature, skin mobility, and superficial fascia.
- Sink slowly: Allow your fingers or hands to meet resistance at the muscle layer, feeling the direction of fibers and their tone.
- Clarify borders: Identify bony landmarks (spinous processes, iliac crest, scapula borders) so you know which muscle you’re on.
- Track structures: Follow muscles from origin to insertion to feel changes in tone or tenderness along their length.
Practicing on yourself and classmates is extremely helpful: feel your own clavicle, AC joint, scapular spine, ASIS, and PSIS, then trace nearby muscles. Over time, you’ll feel less like you’re “guessing” and more like you’re reading a familiar map.
Systematic Palpation: Comparing Side to Side
To make palpation data clinically useful, you need a systematic, repeatable approach that allows comparison.
Helpful habits:
- Palpate bilaterally: Compare left and right sides in similar positions.
- Use consistent pressure: Start lightly, then gradually increase; don’t dive deep on one side and stay superficial on the other.
- Move from general to specific: Begin with broad contact to get an overall sense of tissue quality, then narrow to smaller contacts (fingertips, thumb) for detailed assessment.
- Check client feedback: Ask, “How does this feel?” and notice when their verbal report matches or contradicts your perception.
For example, if the client reports right-sided low back pain and you find significantly higher tone and tenderness in the right quadratus lumborum versus the left, that asymmetry becomes part of your assessment and treatment priorities.
Example: Palpation Findings Turned into Notes
Here’s how palpation data might look when translated into simple chart notes:
| Region | Palpation finding | Clinical meaning / plan |
|---|---|---|
| Upper traps (R>L) | Increased tone, tenderness on R | Prioritize gentle to moderate work on R upper trap |
| Levator scapulae (R) | Ropy band, moderate tenderness near insertion | Include specific fiber-aligned stripping |
| Thoracic paraspinals | Mild hypertonicity, no focal tenderness | General relaxation work, not primary focus |
| Rhomboids | Slight hypotonic feel, minimal client sensation | Support but not main target |
Notice that the findings are descriptive, not diagnostic. You’re not labeling “trigger point syndrome” or “fibrosis”—you’re describing what you felt and how you plan to address it.
Scenario: Using Palpation to Refine a Treatment
Imagine a client, Leo, age 32, who complains of “tight shoulders” and frequent tension headaches. On observation, you notice slight forward head posture and rounded shoulders. During palpation with Leo seated or prone, you explore:
- Upper trapezius: On both sides you feel increased tone, but the right is markedly more ropey and tender.
- Levator scapulae: On the right, you find a taut band with a small tender nodule near the superior angle of the scapula; when you press, Leo reports familiar pain up into the neck.
- Suboccipitals: Bilaterally tight and tender, with a “crowded” feel near the occiput.
- Pectorals: Mild tightness and reduced tissue pliability compared to lateral chest.
From this, you conclude:
- The right upper trapezius and levator scapulae are key contributors to Leo’s perceived shoulder tightness and headache pattern.
- The suboccipitals are worth addressing gently because they reproduce the upper head/neck tension.
- The pectorals may be contributing to the forward shoulder posture but are not as acutely symptomatic.
Your treatment plan for the session might include:
- Broad, warm-up strokes to the upper back and shoulders.
- Specific fiber-stripping and gentle ischemic compression to the right upper trapezius and levator scapulae, guided by Leo’s feedback.
- Gentle work to the suboccipitals with careful monitoring of comfort.
- Some myofascial and lengthening work to the pectorals to support postural change.
At the end, you briefly re‑palpate the key areas to note changes in tone or tenderness and ask Leo how they feel compared to the start. Over several sessions, this repeated palpation becomes a way to track progress.
Building Better Palpation: Practice Strategies
Palpation skill is built through repetition and mindful practice, not force.
Practical tips:
- Slow down: Move your hands more slowly than feels natural; fast hands miss important details.
- Use less pressure: Start lighter—subtle differences in tone and texture often disappear under heavy pressure.
- Practice with intention: Each session, choose one region or structure to focus on (e.g., scapular border, SI joint area, hamstrings).
- Cross-check: After you palpate an area, ask the client what they feel. Compare that to your impression and adjust.
- Reflect after sessions: Jot down what felt clear and what felt confusing; revisit those areas in future practice.
Over time, you’ll notice that your treatment planning begins during palpation, as your hands gather data and your mind links it to the client’s story, posture, and movement. When touch becomes assessment, massage shifts from routine “muscle work” to thoughtful, clinically informed care tailored to the person in front of you.

